AI Virtual Staging Before and After Examples

Compare real before and after AI virtual staging examples that show how a vacant listing, a short-term rental bedroom, and a renovation preview can become clearer visual assets for buyers, guests, and clients.

Reviewed visual proof

Before and after cases used for this topic

These examples were selected to show a clear paid-use reason: listing photos, rental appeal, renovation planning, or client presentation.

View Gallery

What a Strong Before and After Should Prove

A useful virtual staging comparison is not just a prettier room photo. It should make the business job of the image obvious: a buyer understands scale, a guest understands the stay, or a homeowner understands a design direction before spending money.

The before photo carries the problem. It may be empty, plain, dated, or hard to read. The after photo should solve that problem while staying honest about the room. For listing use, fixed architecture and permanent finishes should remain believable. For renovation preview, larger finish changes are acceptable only when the page clearly frames the image as a concept.

How to Judge an AI Staging Result

Review the output in three passes. First, check whether the room still feels anchored to the original photo. Second, check whether furniture scale and perspective look natural. Third, ask whether the after image creates a stronger reason to click, book, show, or approve the project.

Weak examples should not be used on SEO pages. If the result is nearly unchanged, visually confusing, too dark, or materially misleading, it belongs in a regeneration queue rather than the public gallery.

Best Uses for Before and After Proof

Before and after examples work best near conversion points: the homepage, Gallery, Realtor pages, Airbnb pages, cost pages, and multi-photo staging pages. These visitors are already asking whether the tool can produce a useful result, so visual proof usually beats another paragraph of explanation.

Tips for Best Results

Follow these recommendations to get the most impactful virtual staging results.

  1. 1
    Start with rooms where the original photo has a clear weakness: empty, dated, plain, or visually hard to size
  2. 2
    Keep the before photo visible near the after result so visitors can judge the transformation honestly
  3. 3
    Use room-specific captions that explain the room type, style, and practical use case
  4. 4
    Avoid examples that change fixed architecture unless the page is clearly framed as renovation preview

Key Statistics

3 use cases
Proof Types
before + after
Best Format
manual curation
Review Need

Frequently Asked Questions

What makes a strong virtual staging before and after?

A strong example keeps the original room believable while making the use case clearer: buyers understand scale, guests understand the stay, or clients understand a renovation direction.

Should I show both before and after photos?

Yes. For real estate and client work, showing both versions builds trust because people can see what changed and what stayed true to the original room.

Can before and after examples be used for Airbnb?

Use them as planning references for how the room could be upgraded, then photograph the real furnished room for the live listing.

How many rooms should I compare?

For listings and rentals, compare the highest-impact spaces first: living room, primary bedroom, kitchen, and any room that currently feels empty, dated, or hard to understand.

virtual staging before and after AI staging examples room staging before after

Ready to stage your space?

Upload a photo and get a photorealistic virtually staged result in 30 seconds. Start with 2 free credits — no credit card required.

How to Review an AI Room Design Before You Use It

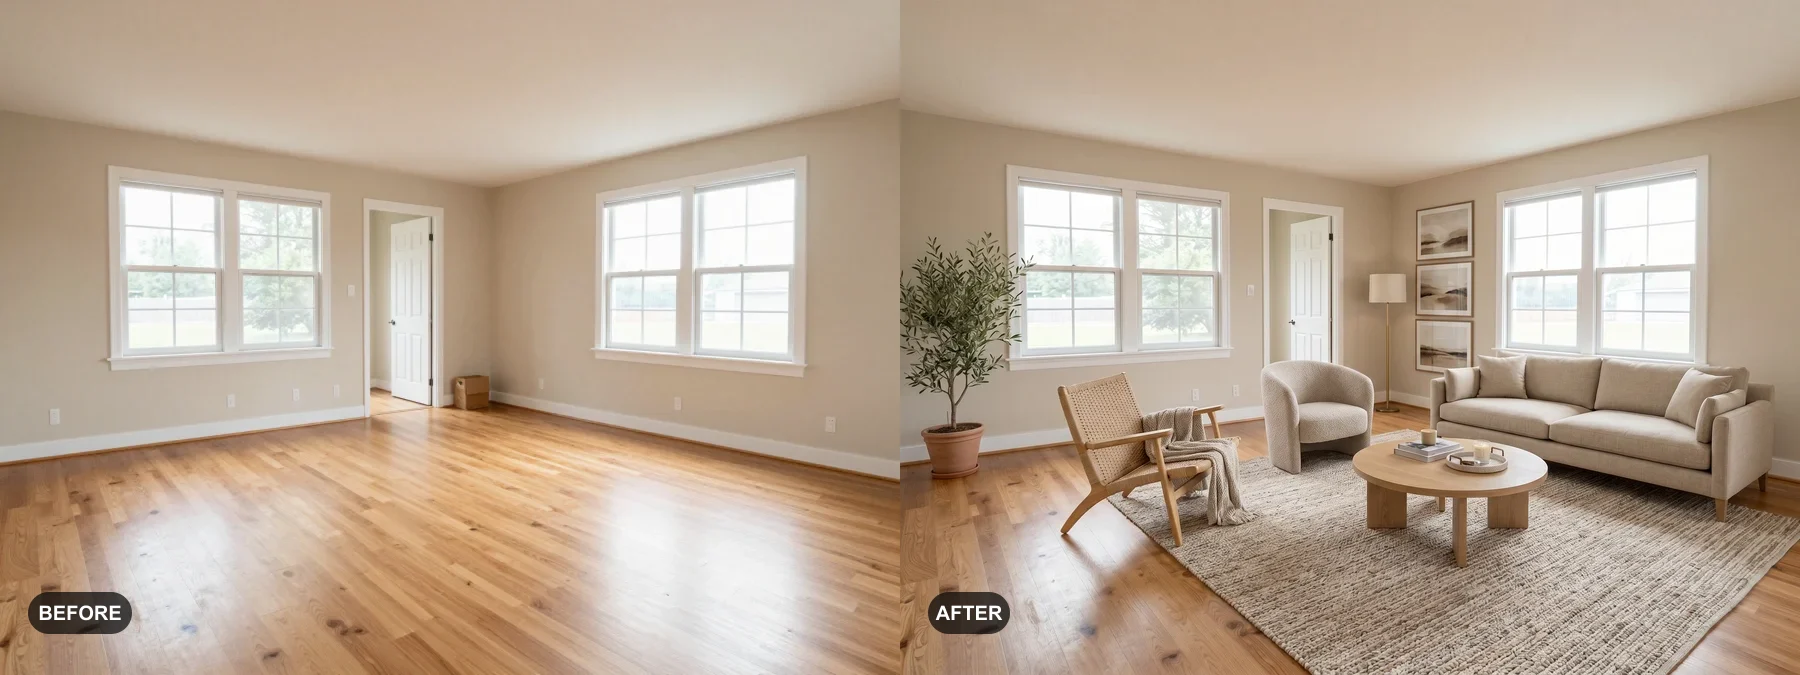
RoomFlip is most useful when the input photo is honest and the output is treated as a design or staging draft. Upload a clear room photo, choose the closest intent, then review whether the result still respects the real walls, windows, flooring, door swings, ceiling height, and built-in fixtures. A room design preview should help someone make a decision, not hide constraints that will still exist in the real space.

Good AI room design starts before generation. Clear clutter, shoot in natural light, keep the camera level, and include enough floor area for the model to understand scale. Extreme wide-angle photos, dark corners, cropped walls, mirrors, and heavy furniture overlap can make results less stable. If the first output feels wrong, improve the input before trying to fix everything with a different style.

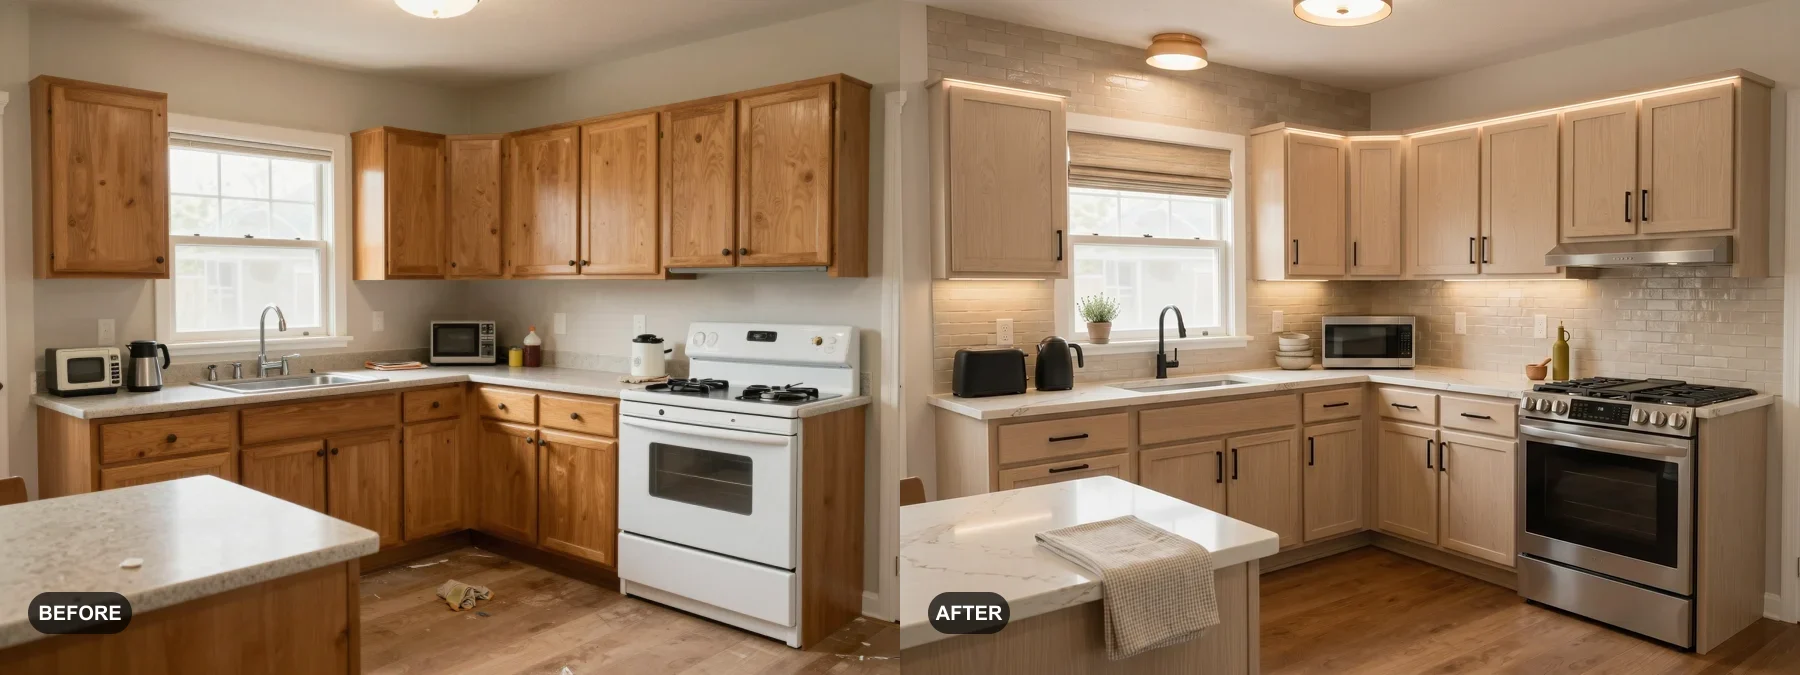
Use style selection as a decision tool. Modern is safest when you need broad appeal. Scandinavian adds warmth and calm. Farmhouse helps kitchens and dining areas feel more family-friendly. Industrial works when the architecture already supports a city loft mood. Japanese and Minimalist styles can calm a busy room, while Contemporary can make a listing feel more polished and premium.

For real estate or rental marketing, compare the original and redesigned image before publishing. If the output changes the perceived condition, size, layout, view, or permanent fixture quality of the room, it should be disclosed or avoided. Keep the original photo available so buyers, guests, clients, or teammates can understand what was changed.

A strong output should pass a simple realism check. Furniture should sit on the floor at believable scale, shadows should follow the room's light direction, rugs should not bend around impossible geometry, and windows, doors, baseboards, counters, and built-ins should remain recognizable. Small artifacts matter because buyers often zoom in on listing photos.

Avoid using AI output as a substitute for professional judgment where safety, legal, or fair-housing concerns apply. Room design suggestions can help with layout, style, and visual planning, but they do not verify building codes, accessibility needs, electrical work, structural changes, landlord rules, HOA restrictions, or local advertising requirements.

The best workflow is to generate two or three plausible directions, not twenty random ones. Pick one safe broad-market style, one warmer lifestyle style, and one premium style. Compare which version makes the room easier to understand. Then save the prompt, style, and output so the same direction can be reused across related rooms or listing photos.

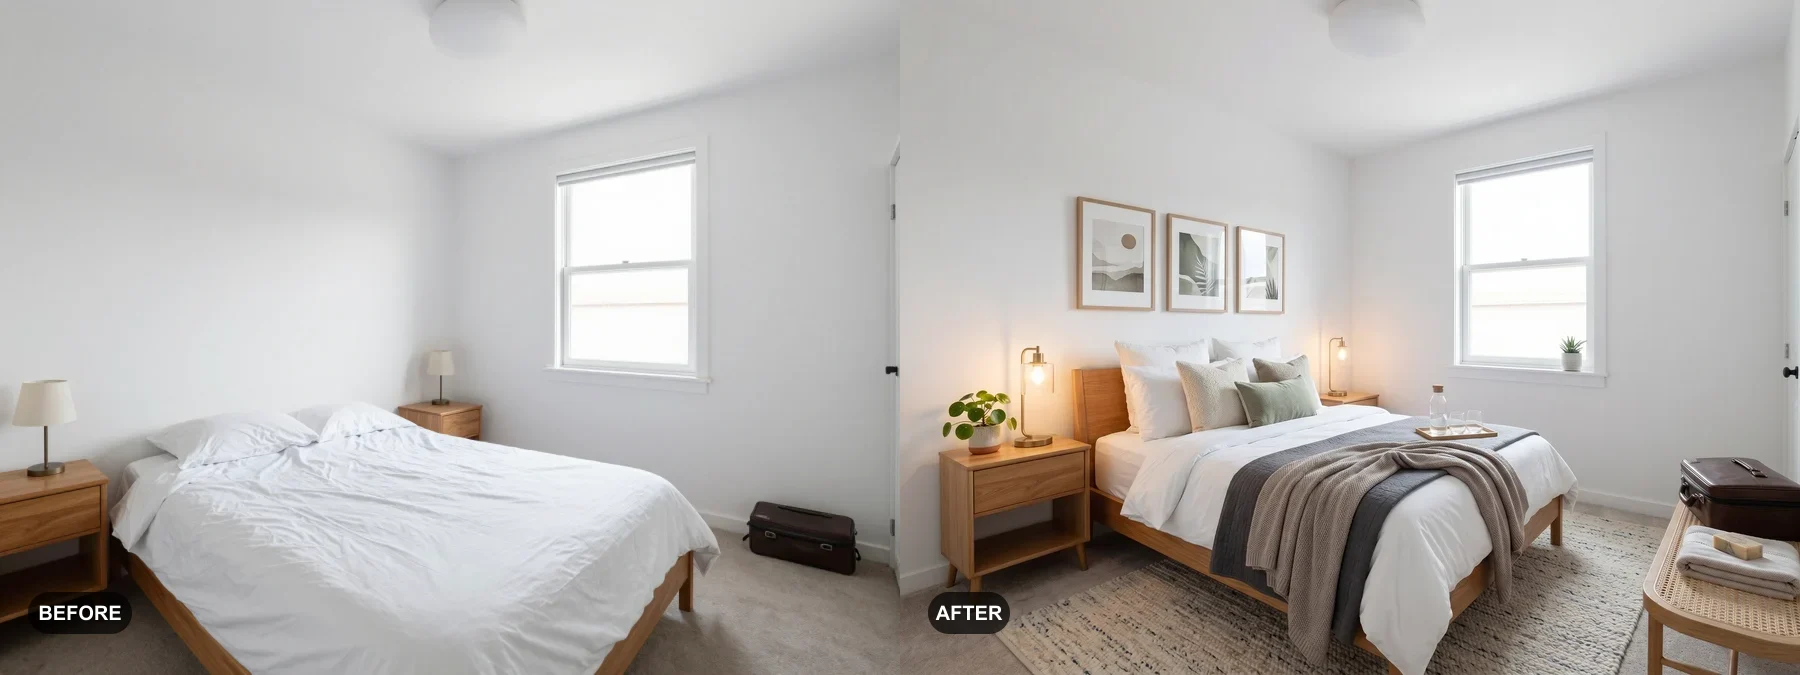
For interior design planning, treat the image as a conversation starter. Use it to decide whether a sofa scale feels right, whether wood tones should be warmer, whether a rug anchors the room, or whether a wall color direction is worth testing. The final purchasing decision still needs measurements, samples, and a budget check.

For listing pages, keep the buyer's job in mind. A buyer scanning a portal does not need a fantasy rendering. They need to understand room function, scale, light, and potential quickly. If the AI output makes the room look impressive but hides awkward circulation, missing storage, or a strange layout, it is not doing the right job.

For redesign pages, record the real constraint before you generate: budget, furniture to keep, rental restrictions, child or pet needs, storage problems, natural light, or a fixed appliance location. The output becomes more useful when it responds to a constraint rather than only applying a decorative style.

For style-guide pages, use the generated room as a reference, not a rulebook. A style that works in one bedroom may feel wrong in a dark kitchen or narrow office. Compare two nearby styles before choosing one direction for a whole property.

Best fit

Empty rooms, early redesign planning, virtual staging, rental refreshes, listing photos, and style comparisons where the goal is to see believable visual options quickly.

Poor fit

Photos with major damage, blocked room geometry, low light, reflective clutter, or any situation where a generated image could misrepresent the real condition of a property.

Before publishing

Compare original and output, confirm permanent features are unchanged, disclose staging when needed, and test the image at mobile thumbnail size and full listing size.

Practical Review Checklist

Does the staged furniture fit the room's actual width, doorway placement, and window height?
Are permanent features such as cabinets, flooring, counters, fireplaces, and built-ins still accurate?
Would a buyer or guest feel misled when they compare the staged photo to the real room?
Does the chosen style match the property price, location, and likely audience?
Can the image still be understood at mobile thumbnail size?
Have you saved the original photo, prompt, style, and generated output for later reference?

Before relying on a redesign, decide what the image is supposed to prove. A homeowner may need a style direction before buying furniture. A host may need to test whether a guest bedroom can feel more premium. An agent may need a listing photo that helps buyers understand an empty room. Each job needs a different level of realism and restraint.

Review the image against fixed constraints. If the room has a low ceiling, narrow door, unusual window, awkward corner, visible vent, dated cabinet line, or flooring transition, that constraint should still make sense in the output. The best AI design keeps the real room understandable while showing a better version of how it can be used.

Use prompts to preserve what matters. Tell the tool to keep existing windows, floors, cabinets, appliances, built-ins, or architectural features when those details are part of the decision. If you plan to renovate those items, treat the result as a concept, not a final representation of the current property.

For real estate pages, avoid over-styling. Buyers need a clear read on function, proportion, light, and circulation. A quiet modern living room that makes the layout obvious can outperform a dramatic render that hides the actual room shape. Keep at least one staged version simple enough for a mobile thumbnail.

For personal design pages, compare nearby styles before choosing one direction. Modern, Scandinavian, and Japanese can look similar in clean rooms but lead to very different furniture purchases. Farmhouse and Coastal both add warmth but signal different buyers. A quick side-by-side prevents expensive mistakes later.

Save the useful context with every output: source photo, room type, style, prompt, credit cost, and what you accepted or rejected. That record turns one generated image into a repeatable design direction for the next room, listing, or client conversation.

A complete room-design page should answer more than "can the AI make a pretty image?" It should help the visitor decide whether the room is suitable for AI redesign, what photo to upload, what style to choose, which fixed features to preserve, how to judge the output, and when the result needs an artist, designer, contractor, agent, or broker review before being used publicly.
Input quality: level camera, natural light, visible floor, uncluttered surfaces, and no cropped corners.
Decision quality: compare two nearby styles before buying furniture, repainting, or publishing a staged listing image.
Publishing quality: keep the original photo, disclose staging when needed, and verify the image does not misrepresent the room.

Some pages on RoomFlip are tools, some are style guides, and some are room-specific planning pages. They should all make the visitor more capable of making a design decision. That means explaining what the AI can change, what it should preserve, what the user should photograph, what the output proves, and what still needs human review before money is spent or a listing is published.

A useful result is not always the most dramatic one. The best version is the one that helps someone compare options, communicate with a client or partner, and move to the next decision with fewer surprises.

When a page is about a tool, the user should leave with a better upload strategy. When a page is about a style, the user should understand the visual tradeoff. When a page is about a room, the user should know which constraints matter most. That practical context is what separates a useful AI design page from a shallow gallery page.

Keep the final step human. A generated image can speed up planning, but furniture purchase, renovation, listing claims, fair-housing wording, and buyer disclosure still need careful review by the person responsible for the real room.

If the page does not help with that review, it is not ready to rank as a decision page.

Every page should leave the user with a clearer next action.

That is the standard for the about page, the tool page, and every style or guide hub.